Showing posts with label Frugal Tips. Show all posts

Friday, November 25, 2011

Frugal Friday–Leftover Turkey

This Thanksgiving we had a 30lb. turkey, which meant a lot of leftover meat. There are numerous recipes and suggestions online for leftover turkey. My uses this year for my turkey are: turkey soup, turkey stock and freezing it for later use. Simple and easy.

Turkey Soup.
Turkey Stock. 
This year was the first time I made turkey soup. I didn't follow any recipes, just made up my own.

Julia's Turkey Soup

Turkey drippings
Water-to finish filling your pot.
3 cups of turkey
1/2 bag of frozen carrots (I really like carrots.)
1/2 bag of frozen mixed vegetables
2 tsp of poultry seasonings
2 tsp salt
1/3-1/2 uncooked barley

Mix all together, cook until barley is soft. Add more poultry seasonings and salt as needed. Many recipes I read used celery.

We served the soup with corn bread and homemade canned peaches. Yummy!

Friday, November 18, 2011

Frugal Friday-Freebies

I enjoy receiving freebies. Freebies in the mail are my newest and fun way to get free stuff. I always get excited when I see one of those little boxes in the mail from a company I received a promotional incentive from.

In the past most of my freebies came from gift bags at stores I shopped from on Black Friday. Samples or rebates I receive from these stores, job and health fair giveaways or Doctor's Offices are great. Many times the samples from the Doctor's office are most helpful. The medicine samples they give, instead of writing a prescription, can save you money at the pharmacy.

The newest place, I get my free and frugal samples are from the internet. You can find blogs which focus on free stuff, coupons and store sales. My most favorite freebie blog is http://freebies.about.com/. If you haven't checked it out you need to.

One of my new freebies. 

Saturday, November 5, 2011

Reasons Why I Grow Food

A growing number of individuals, families and neighborhoods are becoming more interested in gardening and growing their own food. The reasons vary but include: desire to save money, concern over pesticides and food-borne illnesses, sense of community (community gardens) are all just a few of the reasons.


 My list of reasons I grow our family's food are;
  •  My love of nature. I enjoy watching nature grow and produce.
  •  The feeling of accomplishment and pride from growing food.
  •  Saving money on groceries.
  •  Relaxation. I feel like I'm in another world when I garden, freeing my mind of everyday life situations.
  •  Knowing the food I cook and place on the table is free of pesticides and contamination of food-borne illnesses. 
  • Sharing what I've grown with friends, extended family and the homeless shelter. 
  • Knowing if a wide spread disaster occurred, I have a little knowledge which could keep us fed during it. 
  • I get to try new food items I've never eaten before, without spending a lot of money. 
  • After the growing season the plants become compost for my soil. Providing me with rich dirt, better in appearance and good for next season's plants. 
  • I grow food my animals like to eat too: lettuce cabbage, tomatoes, squash etc. Helps save on pet food bills.
  • Gift giving. I can some of my fruit and use for Christmas gifts. 
  • I like the way my canned goods look on my pantry and cabinet shelves. Edible home decor!
  • I get exercise when I garden. Pulling weeds, pushing a wheel barrel full of dirt or compost all add up to calories burned. 
  • The food is always fresh.
  • I also use home grown food for trade for other garden items from friends I didn't grow. 
  • And of course just for the sheer beauty of it.
What are some of the reasons you garden?


Friday, November 4, 2011

Frugal Friday–Cheap Dates

All married couples need time to focus on each other, away from other responsibilities. My husband enjoys  the movies. When there is a movie we both want to see, we go to a matinee and don't buy snacks to keep the cost down.

Our favorite date is hiking. We have numerous trails within walking distance of our home, making the cost free.

A day of hiking.

Friday, October 28, 2011

Frugal Friday-Like Mother Like Son

Our local furniture store has a large trailer they load cast-off furniture into. Anyone in the community is welcome to pick up any of the items in the trailer. (They even have a sign to let you know it's ok to pickup but not to dump.)

My son, whom I've been trying to teach to be frugal, decided he had a need for the light blue recliner he found in the trailer one night. He called my husband for help with loading and transportation. Now he is the proud owner of a "free" recliner.

I've been trying to rub my frugalness onto my family, I guess it's working. (Don't you just love free stuff?)

In good condition, just needs a good cleaning. 

Friday, October 21, 2011

Frugal Friday-Trade

One way of saving (and my most favorite), which is a win-win situation for you and a friend, is trade. I have a friend who grows many different vegetables I haven't tried before. She frequently will provide me with various vegetables and herbs. My last trip to her home I came back with a Red Kuri Squash, a white colored radish (I forgot the name of it) and different types of tomatoes. In trade I give her home grown chicken eggs and fruit from my trees.

Part of my latest trade; we ate the squash already. Yummy!

Friday, October 14, 2011

Frugal Friday

I recently found a few Crab Apple Trees on the trails I hike. At my request my son went foraging for me and brought home a backpack full of apples. I already have a lot of dried apples from my own tree. I don't make apple pies (too much work) so what do I do with all the apples? Make apple bread!

Foraged Crab Apples.
Homemade bread is a frugal alterantive to store bought bread. The apple bread I made was inexpensive for several reasons, the apples were free because they were foraged, the flour and sugar were on sale for less than half the normal price and the eggs came from my own chickens.

Farm fresh eggs, straight out of the chicken, into the carton.
1/2 price flour with other ingredients for bread. 
 I used a recipe I found from allrecipes.com.

Apple Bread Recipe

3 cup All-Purpose flour
2 teaspoon cinnamon
1 teaspoon baking soda
1/2 teaspoon baking powder
1/2 teaspoon salt
1/2 cup vegetable oil
2 cups sugar
2 eggs, beaten
1/2 teaspoon Vanilla
2 cups apples-peeled, cored and coarsely chopped
1 cup chopped walnuts

In a bowl, combine flour, cinnamon, baking soda, baking powder and salt; set aside. In large mixing bowl, place oil, sugar, eggs, vanilla and apples. Stir into flour mixture. Add walnuts and mix. Divide mixture between two greased 8" x 4" bread pans. Bake at 350 degrees for 40-45 minutes or until bread tests done. Cool for 10 minutes on wire rack before removing from pan.

Egg mixture. 
Egg mix with apples and cinnamon applesauce. 
I made a few adjustments to my bread. I didn't use walnuts and I added 2/3 cup of cinnamon applesauce, decreasing the amount of cinnamon I used from the recipe, because the mixture wouldn't come together well due to it being so dry.

Finished apple bread. 

I made several loaves; wrapped them and put them into the freezer. Hope you enjoy this recipe.

Friday, October 7, 2011

Frugal Friday-Foraging

Foraging is a great way to save on your grocery bill. On the trails I hike, I found three apple trees loaded with apples. It was fun to pick free food. Now I'll have to decide what to do with them, dry, can or use them in a recipe; decisions, decisions!

Weighted down with apples. 
Ready to be picked.  
Fruit from my foraging. 

Sunday, October 2, 2011

Frugal Friday–Late Entry

We've been crazy busy this weekend with a yard sale. Yard sales are a frugal activity where shoppers can get bargains and sellers can make money and de-clutter. A win-win situation. Unfortunately, yard sales, as a seller is my least favorite activity. I do like them when I'm in the need of something.

This weekend's yard sale occurred at a storage unit business. All the renters were allowed to open their unit and sell their stuff. It was also open to anyone who wanted to rent a unit for just the sale, cost being $10.

One view of the sale.

My husband joined in to sell some of his office equipment. 

Sunday, September 25, 2011

My Sunday Canning Project in Steps and Pics

It is Sunday.  I went to church then came home to attempt to put a dent in all the peaches I picked. This is my second time of canning more of them. I've found canning is time consuming and laborious. I tried to develop a system this time to make it a little easier. I believe I did.

My first peach canning adventure, I canned seven quarts and 1 pint. It took four and a half hours. This time I've canned ten quarts in about three and a half hours. Progress! Still a lot of work though, I think I need a nap.

Here are the steps I used for canning this time;

  1. Gather all equipment: bowls, pots with lids, large spoons, canning funnel, jars, lids and bands, butter knife, pot holders, quilt, jar grabber, measuring spoon, and food ingredients.
  2. Wash jars, lids and bands.
  3.  Place jars in water bath canning pot, note how many can fit.
  4.  Boil jars to sterilize them.
  5. Mix your sugar and water in a pot to make your syrup. I used a medium syrup consisint of 4 cups of water and 3 cups of sugar. Simmer until mixture is clear. Set to the side.
  6.  Mix 2 tablespoons of lemon juice into 4 cups of water. This solution will prevent peaches from turning brown. 
  7. Wash peaches, cut in half lengthwise (this will make peeling easier).
  8. Boil water in large pot.
  9. Place cut peaches in pot and blanche for one minute.
  10. Remove and spread out on clean surface i.e. towel, cookie sheet.
  11. Peel peaches and remove seeds. 
  12. Place peaches in lemon water.
  13. Remove peaches from lemon water and rinse with fresh water.
  14. Place peaches in hot syrup. Simmer for 2 minutes.
  15. Have jars ready, place peaches in jars using funnel to avoid dropping peaches. Leave 1/2 inch head room.
  16. Pour syrup in jar to 1/2 inch headroom. 
  17. Take butter knife or small spatula and insert between jars and peaches, moving knife gently around the inside of the jar. This will decrease air bubbles. 
  18. Place lid and bands on jar. 
  19. Place jars in water bath canning for set amount of time, determined by size of jars and elevation of where you live. I live over 4000 feet above sea level and used quart jars. My process time for my peaches was 70 minutes. I usually leave them in another 5 minutes for safety. 
  20. After alotted time, remove jars and place where they will not be distrubed, to finish process. I place mine in a quilt to keep them warm a little longer.
  21. Once they are sealed (the center of the lid is no longer elevated) label and shelf them.
  22. Give as gifts or use for your family consumption.
Using a step by step system made it easier and more enjoyable this time to can. I'm looking forward to canning the rest of my fruit, to enjoy this winter.

Sterilze jars. 
Sugar and water for syrup. 
Lemon water. 
Wash peaches  and cut in half lengthwise.
Blanche, lay out to cool for peeling. 
After peeling place in lemon juice, then rinse with fresh water.
Place peaches in syrup to simmer 2 minutes 
Put the peaches in jars, add syrup, use butter knife to get rid of air bubbles.
Apply lids and bands. 
Process in water bath canner for appropriate time. 
After water bath, place to the side undisturbed to allow sealing
After sealed and cooled, label and shelf. 

Friday, September 23, 2011

Frugal Friday Picture

Line drying is one of my favorite frugal activities. It doesn't only save money but provides me with another excuse to get outside away from the inside chores.

Thursday, September 22, 2011

Busy Canning Season

I had so much fruit this year, I've been canning and drying as much as I possibly can. It is a time-consuming and overwhelming job. When the amount of fruit is more then I can process, I give it away to friends, family and our local homeless shelter. I hate for the fruit to spoil if someone else can use it.

At present I've canned and dried; 25 jelly jars of plum syrup (I was trying for jam), 7 pints of pears in light syrup, 2 quarts of dried cherries, 19 jars of cherry jam, 1 1/2 pints of dried apples and I'm not done yet. I still have a small amount of plums and apples on the trees. The peaches on one of my trees are ready and about 1/2 have been picked. The other peaches on the second peach tree are still too green.

Today I plan on drying apples and preparing for canning peaches; hopefully I'll have enough time to can part of my peach harvest today. I like canned peaches best out of all my fruit and look forward to the end product.

The light syrup recipe I used for my pears is: 4 cups of water and 2 cups of sugar. I'll be using a medium  syrup for my peaches. The recipe is: 4 cups of water and 3 cups of sugar. I haven't used these recipes before, but I will write a review later on how well they worked.

My first batch of dried cherries I attempted in the oven. The dryness of the fruit varied and a small portion burned. The cherries I dried in my new dehydrator came out perfect. But it took about 18 hours for them to dry.

The plum syrup was my first attempt at plum jam. I looked up several recipes and none had suggested pectin. I just put the plums in a pot with sugar on the stove to cook, as suggested. After a few minutes of cooking, I  blended, put the mix in jars and canned them. And ta da, syrup. Tastes sweet with just a hint of plum tartness.

I haven't tried the pears yet. The apples turned out wonderful. Sweet and slightly chewy. I dried them in the dehydrator for about 8 hours.

To prevent my pears and apples from browning, I soaked them separately in a solution of 1 quart water and 2 tbsp lemon juice. The pears didn't brown. The apples only have a light browning on a few of the slices.

The labels are designed and printed by my husband who is a graphic designer. He wanted my jars to look pretty for gift giving.

Cherry Jam
Plum Syrup
Dried Apples
Canned Pears
Dried Cherries
Finished products
Apples to dry. 
Peaches to can. 

Saturday, August 6, 2011

New Potatoes

I've did a little gardening over the years but never had time to really do much because of working full-time. This year was different. I'm only working part-time and decided to plant vegetables I never planted before, like potatoes. I wasn't sure how my little crop would turn out; but I found out tonight.

I dug a few potatoes out from one of my large planters. I was really surprised I actually had potatoes. I quickly took them into the house, showed my husband the fruit of my labors, then prepared them to put in with the chicken I was roasting. They made a delicious addition to our meal.

My 1st home grown potatoes.

Monday, August 1, 2011

Frugal Mulch

I've been trying to be frugal to save money and have fun. (I believe saving money is fun.) Our yard was starting to look a little shabby and needed a new load of mulch applied. I can't afford regular bagged mulch or even a truck load of mulch. Instead I try to get free mulch in the form of tree trimmings from local tree service companies.

I was out running errands one day and spotted one of our two local tree companies. I had not met this particular company before, but I thought what do I have to lose. I stopped and asked what they did with the tree trimmings from their jobs. They said they give them away. Hooray free stuff! I asked if I could have the load they were working on. The worker said they could bring a load but didn't know when. He would ask the owner. I gave them my address and left.

I went home and told my husband what I did and left $20 for the tree workers to have lunch if they came by while I was still running errands. Yes they did say the trimmings were free. My purpose in leaving $20 was to be nice to the workers. We live in a small town and friendly gestures go a long way. I'm sure I will need more trimmings for mulch in the future and hopefully they will remember my kindness and bring them to me again. And even if they don't remember me it is always nice to do something for some one else. It is OK to be frugal, but not overly cheap.

I didn't think to take pictures of the large load they brought until after I started distributing it. As you can see below, they brought a rather large load (about five yards my husband says). What nice guys. It took two pics to capture the whole load (even after moving some to the yard.) I still have a lot and will probably share with my elderly neighbor.

1st half
2nd half 
One view of the mulched front yard.

Friday, February 18, 2011

Frugal Tips-Energy Savings

Friday's Frugal Tips are on Energy Savings.
We used to live here. 
  • Turn off lights when you leave a room.
  • Open your curtains and use sunlight instead of houselights.
  • Use CFL bulbs.
  • Put extra insulation in your home's attic to keep in the warmth.
  • Keep your thermostat at 65˚ in winter and 72˚ in summer.
  • Live in as small a house you can to use less energy. Small homes cost less to heat and cool. We presently live in a 900 sq. ft. house. 
  • Use plastic on windows in winter. This is a must in Northern California.
  • During winter wear layers to avoid turning heat up.
  • Drink hot fluids or eat hot foods like soup to warm up instead of turning up the heat. 
  • Burn wood for heat. 
  • Unplug electronics when not in use, they consume energy even when off. Or if using a power strip, turn it off when electronics aren't in use. 
  • If you want a hot tub, build your own and heat it with wood. Find out how here.
  • Caulk windows.
  • Seal doors. 
  • Use energy star appliances.
  • Wash full loads of clothes and dishes.
  • Air dry clothes and dishes.
  • Use cold water for washing clothes or at least rinsing.
  • Keep the thermostat of your hot water heater at 120˚.
  • Use a solar oven for baking. Learn how to make one here or to purchase one go here.
  • Lay rugs on bare floors for warmth.
  • Blow/hair dryers use a lot of energy, air dry your hair. 
  • Use energy star appliances. 
Hope you are having frugal fun with Friday's Frugal Tips. 

Friday, February 11, 2011

Frugal Tips-Family Activities

Family activities are another area which can be expensive. We all need to have a little fun and family time in our lives, and it doesn't have to be expensive. Since my injury and being temporarily disabled, we have learned a lot of ways to have inexpensive family-time and fun.
Hiking with friends. 
  • Talk together as a family.
  • Play board games or cards.
  • Have a guest over for dinner and games.
  • Write a blog.
  • Read someone's blog and leave an encouraging comment.
  • Watch animals; yours, neighbors, wild ones.
  • Read a book.
  • Watch free TV shows on-line.
  • Visit a neighbor.
  • Study the Bible.
  • Go to church.
  • Join a women's group. Our women's group has a breakfast meeting monthly, cost is $3.
  • Write a letter.
  • Keep a journal.
  • Help your children with their homework. You never know what you will learn or how close you will become to your kids.
  • Visit the elderly. I visit a 91 year old lady a couple times a week. She has an outrageous sense of humor.
  • Make a phone call to a friend.
  • Borrow movies from the library.
  • Bake cookies from scratch.
  • Play in the snow.
  • If you eat out order the $1 menu or kids meal. 
  • Don't purchase magazines. You can borrow those from your library also.
  • Our community college periodically has free concerts from local musicians. 
  • Find out about free days at the local museums and zoo.
  • Volunteer for local events which allow you free entrance to their shows.
  • Have a picnic.
  • Go on a hike.
  • Use a digital camera and see what interesting photos you can take.
  • Have a contest with your family to see who can make the best desert.
  • Family trip to the local feed store to enjoy the new spring chicks and ducks. 

With these tips you can have some valuable family time while having fun. 

Friday, February 4, 2011

Frugal Tips-Clothes

Here is Friday's Frugal Tips related to clothes. It is not too hard for me to be frugal with clothes. I don't like to shop and I keep a simple wardrobe.
Jeans, the norm for me. 
  • Don't recreational shop for clothes.
  • Mix and match clothes you already have.
  • Mix up your accessories with your outfits.
  • If you do shop, purchase clothes and accessories from; yard sales, thrift stores, consignment shops, clearance racks, at the end of a season, online clearance if shipping is free.
  • Don't buy or own 'dry clean only' clothes. Dry cleaning is expensive.
  • Mend your clothes.
  • Borrow clothes.
  • Have a clothing swap.
  • Wear clothes in basic colors. It is easier to mix outfits if they are basic colors.
  • Shop Back-To-School clothing sales. 
  • To decrease wear and tear on your clothes don't wash them unless they are dirty and hang them up to air dry.  If you put them in the dryer make sure buttons are fastened and zippers are zipped. Buttons and zippers can do damage to clothes while they are being washed or dried.
  • Have basic colored and styled shoes to go with multiple outfits.(I know most women like shoes, I know they are a weakness for me. Remember to be realistic if you have more than two or three pairs. Make sure they are something you are really going to wear and not just look good on the closet floor.) 
  • Save clothes outgrown by older children for younger children to grow into.
  • Buy quality over quantity. I know I have purchased brand name items, still with the tags on them at second hand stores. Quality items last longer, saving a bundle. 
  • Learn to sew clothes. Make sure you purchase good quality material which is inexpensive, or sewing can become expensive.  
  • Keep a budget of how much you realistically can spend a year and stick too it.
I hope these tips help in cutting your clothing costs.

Black is always in style. 

Friday, January 28, 2011

Frugal Tips-Bathroom

Here is my next post of frugal tips for Friday. These tips I use in the bathroom.

Bathroom:
  • Don't wash hair twice. Once is enough. Saves on shampoo.
  • Wash hair every other day. Also saves on shampoo.
  • Take showers instead of baths. Saves water and utilities to heat the water.
  • Keep hot water heater no higher than 120 degrees. Higher increases your utility bill and may scald children or the elderly. 
  • Squeeze toothpaste from bottom to top, when finished cut open and ensure you have all toothpaste out.
  • Clean bathroom with vinegar and water—salt for scrubbing.
  • Use bath towels at least three times. They don't get dirty from just water. As a nurse though, I don't recommend more than three uses because towels can rub off normal skin bacteria and skin cells. 
  • Don't run water when brushing teeth.
  • Install a low flow toilet or add a bottle of water inside the tank to cut down on water usage.
  • Use a bucket to catch cold water when taking a shower until it gets warm enough for you to get in. Water plants with it. 
  • Install a low-flow showerhead.
  • Install a tankless hot water heater. Look for rebates or tax credits to assist in cutting cost.
  • Use a little inexpensive conditioner as shaving cream instead of the expensive shaving cream. (When shaving legs)
  • Dry disposable razors to have them last longer.
  • Rinse hair with a 1/4 cup of apple cider. Works well and cuts away any residues from hair styling products.
  • Use a little baby oil to soften skin instead of expensive lotions.
  • Don't wear makeup or minimal makeup when going out.
  • Use sugar to exfoliate skin.
  • Use baking soda as a face exfoliate.
  • Use a small amount of baking soda mixed in a little shampoo to rub away residues from hair.
  • Limit time in showers or turn shower water off when lathering and turn back on to rinse.
  • Use vinegar and water to mop bathroom floor. Vinegar is acidic and will kill bacteria.
  • Make sure your toilet doesn't run continuously. Either put a dark color of Kool-aid into the tank or squirt a colored shampoo on the inside of the bowl. If there is a leak the Kool-aid will stream down or if using shampoo you will see the water run through it.  
  • Turn off faucets fully to make sure there is not a drip. 
  • To decrease spreading germs, give each family member a cup to rinse with after brushing teeth. Do not reuse. Illnesses are costly—not just financially. Loss of school, work and family time too.  

I hope you find these tips helpful. If I find I have forgotten something I will add them into my last catch all post.

Thursday, January 20, 2011

Frugal Tips-Laundry

Friday's Frugal Tips—Related to laundry.  It may sound crazy, but laundry is one of my favorite housekeeping activities. Not sure why, but it may have to do with having clean clothes, using my frugal tips and also being outside to hang clothes. Tips I use consist of:
  • Hang dry clothes either outside on a clothesline or inside on clothes racks. 
  • Use 1/4 cup of vinegar in rinse water for fabric softener; Brightens clothes and gets rid of static cling. 
  • Use cold water instead of warm or hot water; Clothes get just as clean.
  • If you use a dryer, use a gas dryer. Gas is cheaper than electric (In many areas of the country).
  • At the end of a wash-cycle, turn the knob back to spin (to wring out the extra water.) Clothes will dry quicker this way.
  • After hanging clothes to dry, if wrinkled either dry in dryer for 10 minutes or hang up on a shower curtain to expose the clothes to steam (gets rid of wrinkles.)
  • Use a little less laundry detergent than what the package recommends. I usually use 2/3 to 1/2 of what is recommended.
  • Make your own laundry detergent (To help save more). Recipes here.
  • If laundry wash water is not too dirty, dip out some of the water, before it drains out, to mop with. 
  • Never buy dry-clean only items. 
  • To preserve clothes, make sure you zip up zippers and button buttons to decrease friction on fabric.
  • Use dryer lint to make fire starters in your wood stove. Find out how to make fire starters http://chickensintheroad.com/crafts/homemade-fire-starters/
  • A little dish soap is a great stain remover. 
  • Wash only full loads.  
  • Reuse jeans and bath towels more than once to decrease laundry.
  • Wash comforters in commercial washers only. A comforter is too big for a standard washer and can actually damage your machine. 
  • If using dryer sheets, cut them in halves or even thirds. 

Accident, Illness and "Homey" Activities

The last week and a half has been a little hectic. Last week on Monday my son went for a bike ride and had an accident. He attempted to apply the back brakes which failed (on a brand new bike), then proceeded to put on the front breaks. He went flying over the handle bars. When he used his arm to shield his face, he fell on his right elbow fracturing it.

Off to the urgent care clinic we went. At the clinic Chris underwent an assessment, an X-ray was ordered, a splint applied and an orthopedic referral made. Of course, there is only one orthopedic doctor in town and he happens to be my doctor too. He was a little surprised to see us in his office. I'm sure having two family members, different accidents, three months apart who are patients is not the norm for him. He ordered an MRI. On our follow-up visit he told us the right elbow joint was fractured. It will take four to six months to heal. Some gentle bending and flexing of the elbow in the shower is needed and physical therapy will begin in three to four weeks. The next visit for Chris's elbow is in two weeks.

Oh, before I forget we went to our family doctor on Tuesday, and my son is also being treated for strep throat.

All the running to doctor appointments, x-rays and pharmacies hasn't left much time for my daily homey activities which I enjoy. That is, until today.

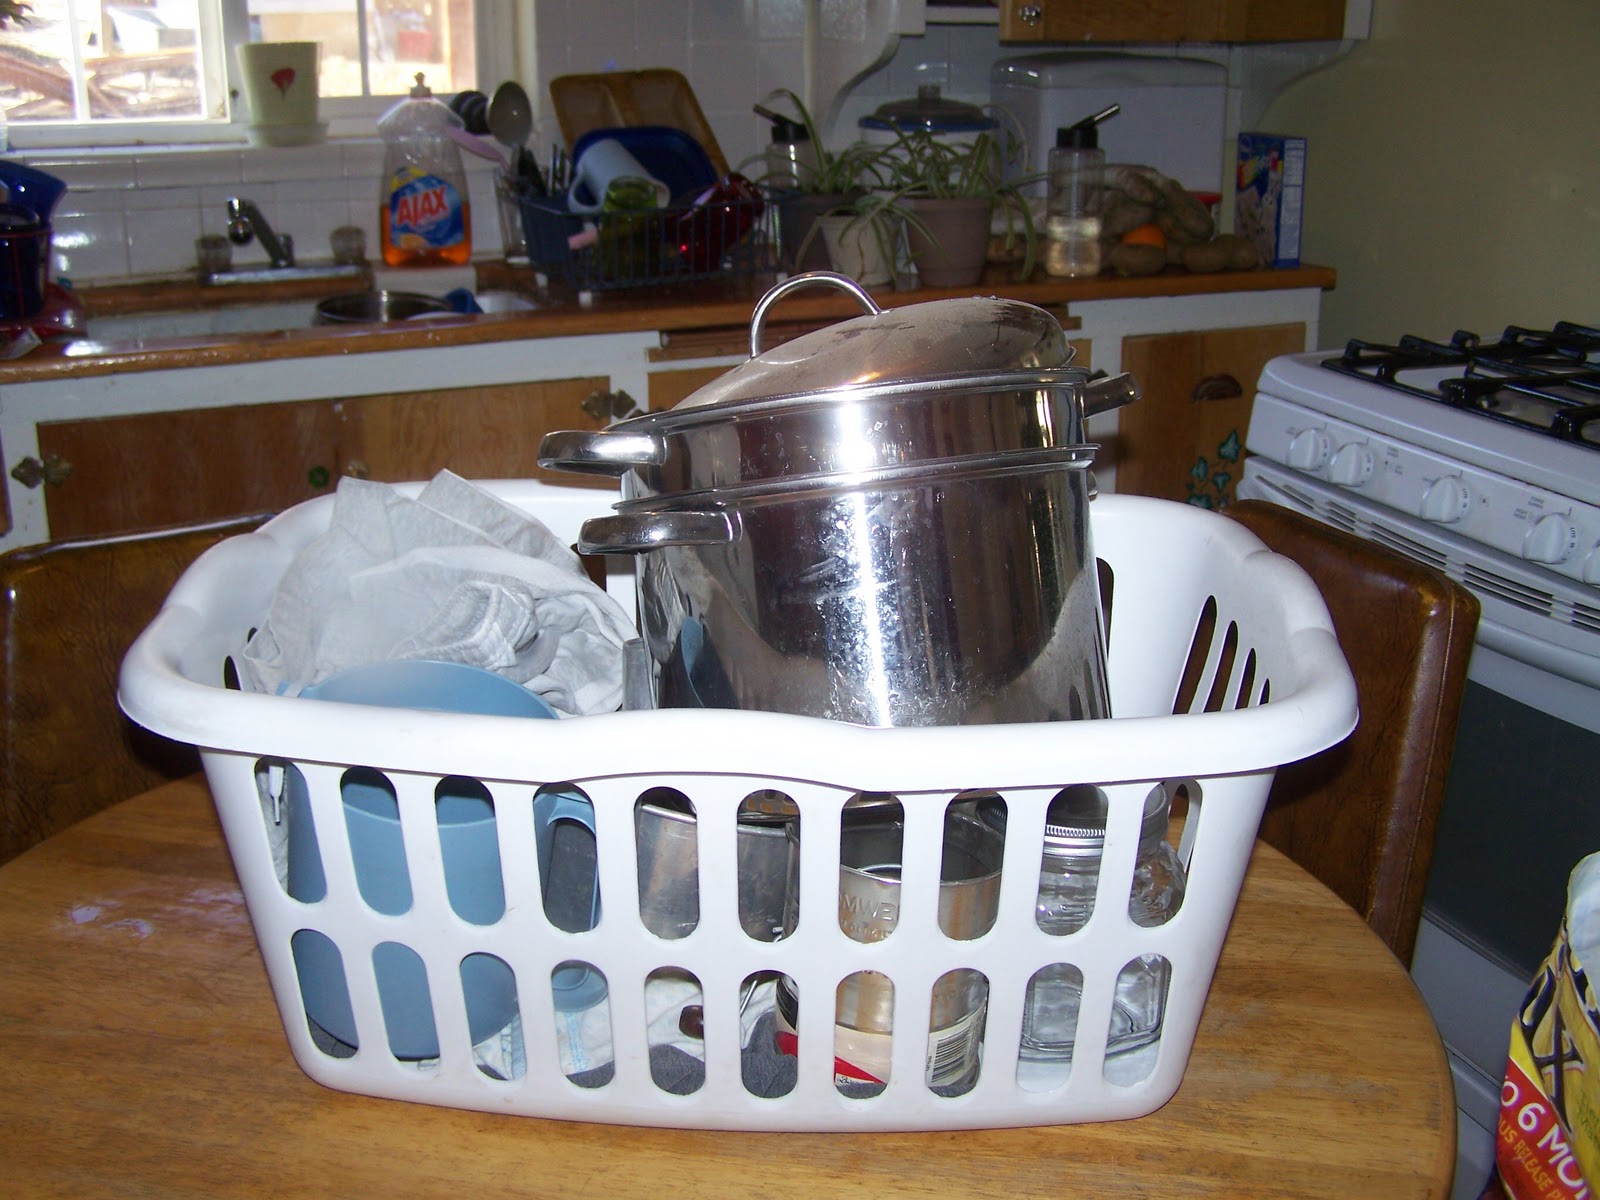
Today, with my son feeling better, I was able to do some things on my to-do list. One thing I have been slowly working at is de-cluttering. On my back porch I have an old refrigerator and a freezer which I use for storage.  I put items in there I don't use every day but use frequently enough I want them nearby. The fridges also serve as storage units for sales items and additional pantry stock.

Refrigerator storage
More stuff for refrigerator storage

Another task on my to-do list is splitting and replanting my spider plant. The task doesn't take long but I haven't been in the mood to do it. The original plant had been split and replanted more than a year ago.  From the first plant I made five cuttings. I kept three and gave two away. My three have now turned into seven. They grow so fast. Now I'm making plans on who to give those to. I also decided to plant one of my peach seeds. We will see it if grows into a tree or not.

Spider Plants
Pot with planted peach seed

Last I did a little baking. Not my typical frugal recipe of making things from scratch. Wait!  Let me explain. My husband found a really good sale on loss leaders at our local IGA. I believe he got the cake mix around 39 cents. Something outrageously cheap. In an inexpensive case like this I can go along with it not being made from scratch. However, I did use frugal, homegrown eggs.

Baking cupcakes and mini-cakes for sharing
Baked and Cooling 
Frosted. Ready to eat and share

At least my chickens have kept up on the homey activities of laying eggs. I've had almost six dozen eggs recently. Now, I'm down to four dozen. I used some for baking and cooking and gave a dozen away to my Christian Mentor when she visited on Monday.

Product of six busy chickens
 five of my busy girls (Sixth Not Pictured)
Things are getting back to normal. I feel complete again.

Related Posts Plugin for WordPress, Blogger...